Hello and Happy Tuesday Everyone, I hope you're having a great day!
Today I have a clean and simple birthday card using the Baroque background stamp from Brutus Monroe using the Zig Clean Color Real Brush Watercolor Markers. For this card today I have a pic tutorial showing how I created this card.
To begin I used Strathmore Bristol smooth cardstock, this is the best cardstock in my opinion to use when using the Zig Markers to get them to blend and move easily on your cardstock/watercolor paper.
I used the Brutus Monroe embossing ink and Raven embossing powder on the Bristol cardstock. By heat embossing the stamp this creates a well to help keep the water from going outside of lines, plus I love the overall look of embossing. I did this twice.
Next I planned on using a couple of shades of purple in the Zig markers and quickly realized one was enough with my water brush.You can create gradients using the water brush. I used NO.82 Purple in the places where I thought the shadows would be, but mostly where the illustrator had already provided which made it quite simple. Then with my water brush, I pulled the color down and using a paper towel, I would tap or dab it on my watercolored piece to soak up any excess water. This process went really fast and was really fun. For the center of the flower I used NO.50 Yellow.
I thought about leaving the piece like this and placing a sentiment on it, which would be pretty, but I went a little crazy and cut it apart! I had a different idea in hoped it would work after all of the fussing cutting!
After I cut all the pieces out I outlined them with a black maker to hide any imperfections from fussy cutting. Notice here one isn't colored, this is why I made two. I knew I wanted one to be uncolored for my card, even as large as the stamp is, I needed that certain flower.
Now to assemble the card. I wanted to have a frame on my card base, right now that seems to be one of my favorite things to create. Using a rectangle die and placing a smaller one inside of a larger one and running it through your manual die cutting machine will create a frame. Make sure to use washi tape or low tack tape to hold your dies in place before running through your machine to avoid shifting.
And this is what it looked like when mine were cut. I used the second/frame piece and will save the rest for future projects.
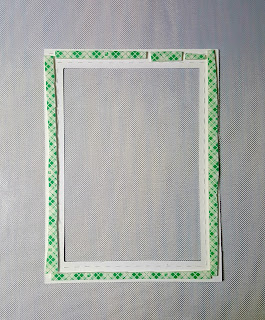
Then I popped the frame up with foam adhesive, and placed it on my card base.
I cut this foam adhesive in half to have a narrow strip. Brutus Monroe carries the Darice double sided foam sticky strips which would have been perfect for this, and for shaker cards. I'll have a link posted below. I need purchase some, everyone says it's just the best for this!
Now to arrange my flowers and as my photo showed I ended up only using two.
I adhered my black and white flower flat to my card base and tucked it under the frame a little bit using the Brutus Monroe craft glue. I used foam adhesive for the watercolored flower to pop it up over the other flower and the frame. I did add some craft glue to the flower where it was over the frame. For my sentiment I chose one from the Botanical Banners stamp set, Happy Birthday. I thought a banner was perfect for this card. I stamped it with Raven Detail ink and fussy cut it out. I popped it up with foam adhesive as well and used craft glue over the frame and tucked it under the watercolored flower.
To finished my card I carefully added Wink of Stella to the watercolor flower not wanting to reactivate it. And I added three acrylic bubbles to embellish.
And that's my card for today, I hope you enjoyed,
Lori
Below is a list of supplies used in today's post.
I use compensated affiliate links when available at no cost to you. When you purchase through the below links it means I receive a small compensation, thanks for your support.


Gorgeous!!! Love this!
ReplyDeleteThank you Lisa!
Delete