Showing posts with label Brutus Monroe Colorburst. Show all posts

Wednesday, March 28, 2018

Mixed Media Extravaganza Blog Hop

Hello and Happy Wednesday Everyone!

Today's blog hop consist of something a little different! Today our blog hop is all about mixed media! Brutus Monroe has tons of mixed media product in the store, and if you are fan of mixed media or new to it, today we are each demonstrating some fun and different ways to use the mixed media products in the store! 

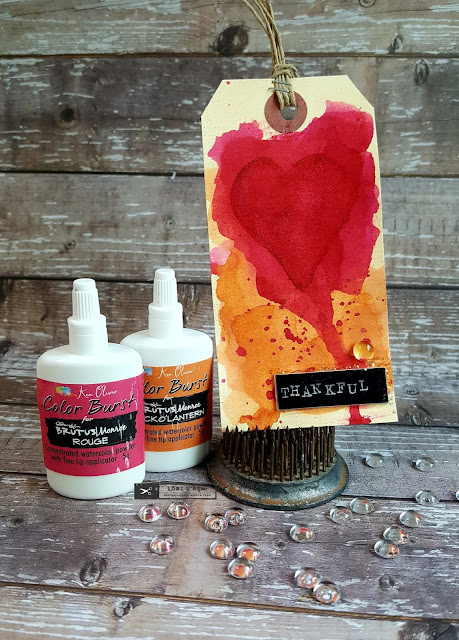
For my mixed media projects I made easy watercolor tags. Brutus Monroe carries several colors in the store and also some jumbo tags, I began here with small manila tags. And I have to say that these first three were test runs and turned out to be my absolute favorite!


All of my tags were created using Brutus Monroe Color Burst, and to keep the paper from falling apart using all of that water I applied transparent watercolor ground from Daniel Smith and dried it with my heat gun and this save me a lot of problems. 

Here is the last tag I created using a jumbo tag.


To began my tag I applied watercolor ground to the tag and dried it with my heat gun. At first I only used two colors of Color Burst, Cornflower and Marsala and achieved some beautiful shades of purple and violet. Later I went back in with green that I mixed with Cornflower and Cabbage, and I mixed a little Jack O Lantern with Zest to get a lighter orange. I used my paint brush to add some splatters of blue paint for texture.


 This photo shows the back of the tag having used the watercolor ground, you can see how the watercolor I've used hasn't penetrated through the tag. The colors you see is the mess I was making on my media mat. I tell you that watercolor ground is a life saver!


Next I used the Polka stencil with the Gargoyle Surface ink to add more texture and interest.


Then I used my Versamarker with the same stencil and Penny embossing powder from Brutus Monroe to do some heat embossing. I also used the embossing pad from Brutus Monroe straight to the bottom of the tag and added the Penny embossing powder there as well. You can see it in the photo after the one below.


Here I felt I needed to add white to the tag, white will come forward on your project if it feels too dark and push all the dark back. I used the birds and bird cage from the Angel Wings stamp set and heat embossed them in Alabaster embossing powder. 


For the finishing details I added a Celebrate word tag I had in my stash and some Acrylic Bubbles. I then stamped some feathers from the Angel Wings stamp set at the bottom in Raven Detail Ink. I kept thinking I needed one more thing so around the sentiment I added some Liquitex Glass Beads, which is supposed to leave a glassy shine, but you defiantly can not see that in the photos. I tied some string around the top, and that completed my project! 


Here's a close up of the glass beads. This is another fun medium!


Remember this is part of a blog hop, be sure to head over to the Brutus Monroe Blog where you can start at the beginning and not miss a thing! Each member of the team has created some great projects for today's hop!

All of today's supplies from Brutus Monroe will be listed and linked below.

Thanks so much for hopping along with us today,
Lori


Wednesday, February 7, 2018

Brutus Monroe January 2018 New Release | Monster Party

Hello Everyone and Happy Wednesday!
It's release week here at Brutus Monroe and we are so excited! This week we are featuring this adorable stamp set called Monster Party! I mean who can resist a monster party combo, right? So much fun. This stamp can provide so many fun birthday cards for boys and girls and adults alike! Also cute Valentine cards as well! 

Today I made a clean and simple, sweet Valentine's card. It came together pretty quickly with minimal supplies, which you may already have in your stash, win, win!


I started first by creating the background using Neenah 80# cardstock. I used the Brutus Monroe Colorburst in Marsala and Rouge, mixed in a paint palette with a dropper of water, I began splattering one color at a time with a fan brush. Then I did more splatters with Perfect Pearls which lit the background up and made it shimmer. Then I heat set the background, or you can let it air dry and move on to watercolor the little monster. Once dried, I trimmed this piece out with a rectangle die.

Here's how the background looked when I was finished.


 And this is the paint palette I used for my Colorburst, my fan brush for splatters, and the dropper is for adding water to the concentrated watercolor. I use one or two drops of water depending on how much I tap out of the bottle. 


I had already stamped my monster on Neenah cardstock, which is not for watercoloring. Carefully, using a little watercolor on my watercolor brush (not shown) I watercolored the monster in with Marsala Colorburst, and then used the Rouge Colorburst to watercolor her spots. Once dried I went in with a copic marker to add contrast to the monster and her spots. I added Wink of Stella all over the little monter for some shimmer and Glossy accents on her spots and toes for dimension. And finished her off with a googley eye with eyelashes! 

I popped her up on foam squares to have her appear to be sitting on top of the sentiment banner. The banner is glued flat to the card with Brutus Monroe craft glue. 

I adhered my panel down to an A2 sized side folding note card, and that completed my card.

All of the supplies will be linked below for today's project.

This post is part of a blog hop so be sure to head on over to Brutus Monroe to see all of the Design Team's creations!

Be sure to follow the  Brutus Monroe blog so you don't miss anything, and follow on social media and tag us with your creations using #createyourownending

You can also follow me here on my blog and on other social media sites below:

Facebook - Lori's Crafty Spot
Instagram- Lori Uren
Twitter - Kajunhunnie

Thanks so much for stopping by today,
Lori